Quick & Easy Process to Get a 30-Day Vietnam E-Visa Explained
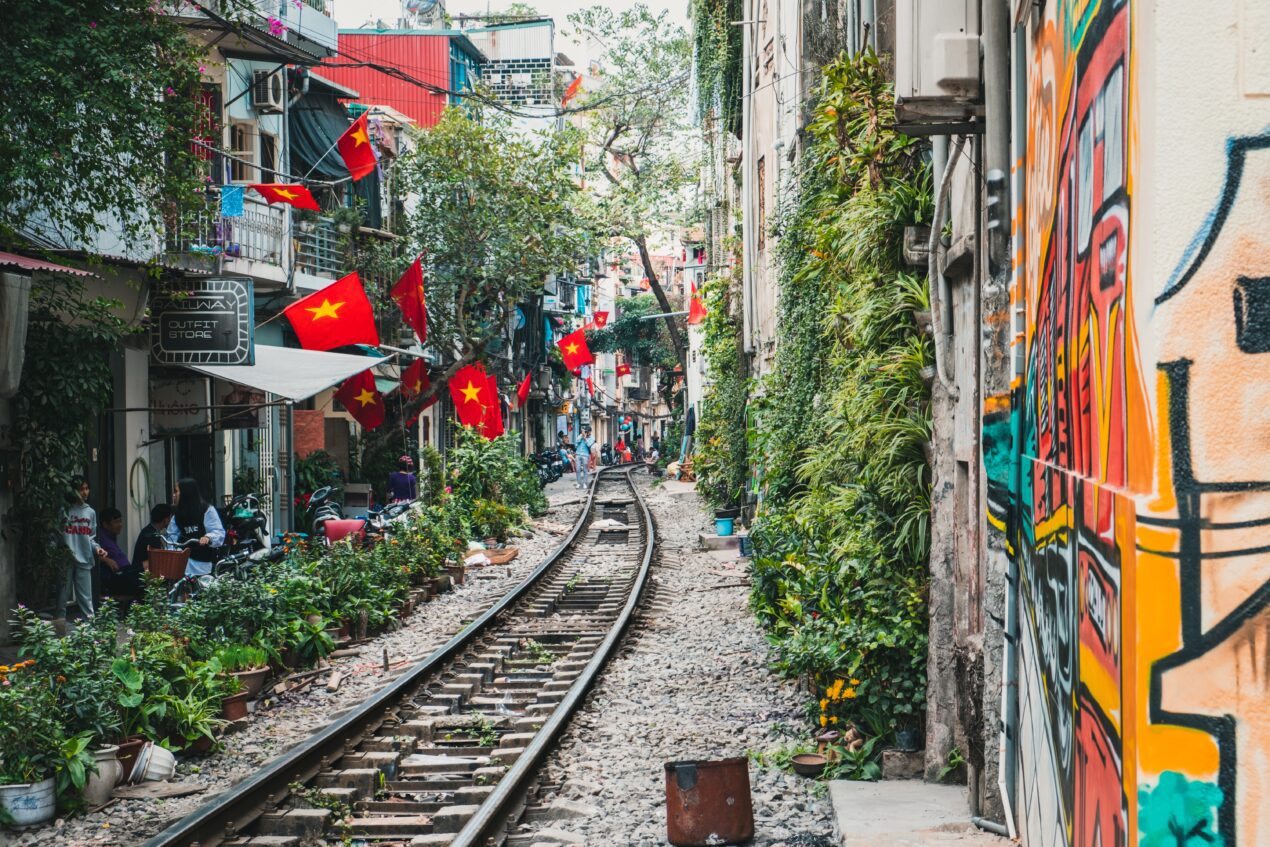
As you may know by now, I’m heading to Vietnam in several days (mid-January, 2022). It has been nearly 3 years since I left Ho Chi Minh to embark on a journey to Europe for a six-month stint and move back to Hong Kong (my current base). I can’t wait to be back.
A part of me was stressed about obtaining a visa for Vietnam as I barely remembered doing so when I first moved there in July 2018. However, then I remembered that it was an absolute breeze and that’s why it wasn’t even registering in my memory.
If you are looking to apply for a 30-day Vietnam E-visa, I’ve got you covered. Below, I will walk through exactly what you can expect when applying, how long a 30-day Vietnam E-visa takes to be processed (and how long mine actually took), and additional considerations to keep in mind when traveling to Vietnam.
Important Note: As of the date of publication, Vietnam is only offering 30-day E-visas for 80 countries. There are also visa exemptions for a handful of countries as well. This article is solely focused on obtaining an E-visa if you are from one of the 80 listed countries.
Applying For a 30-Day Vietnam E-Visa
First, while yes there are countless Vietnamese visa agencies that you can go through if you are looking to just apply for a 30-day E-visa, I recommend going to the official government website and portal for a straightforward and hassle-free application. I know what you are thinking – what a crazy URL for a government website. You are right, it is. But don’t worry! It’s legitimate.
Further, there is a second government website that has a bit more standard URL/slug, which can be found here: https://immigration.gov.vn/en_US/web/guest/home
Both websites and portals support the same process for applying and you will actually find after you submit your application and are approved that you will receive an email containing both links.
Step 1: Click on E-Visa
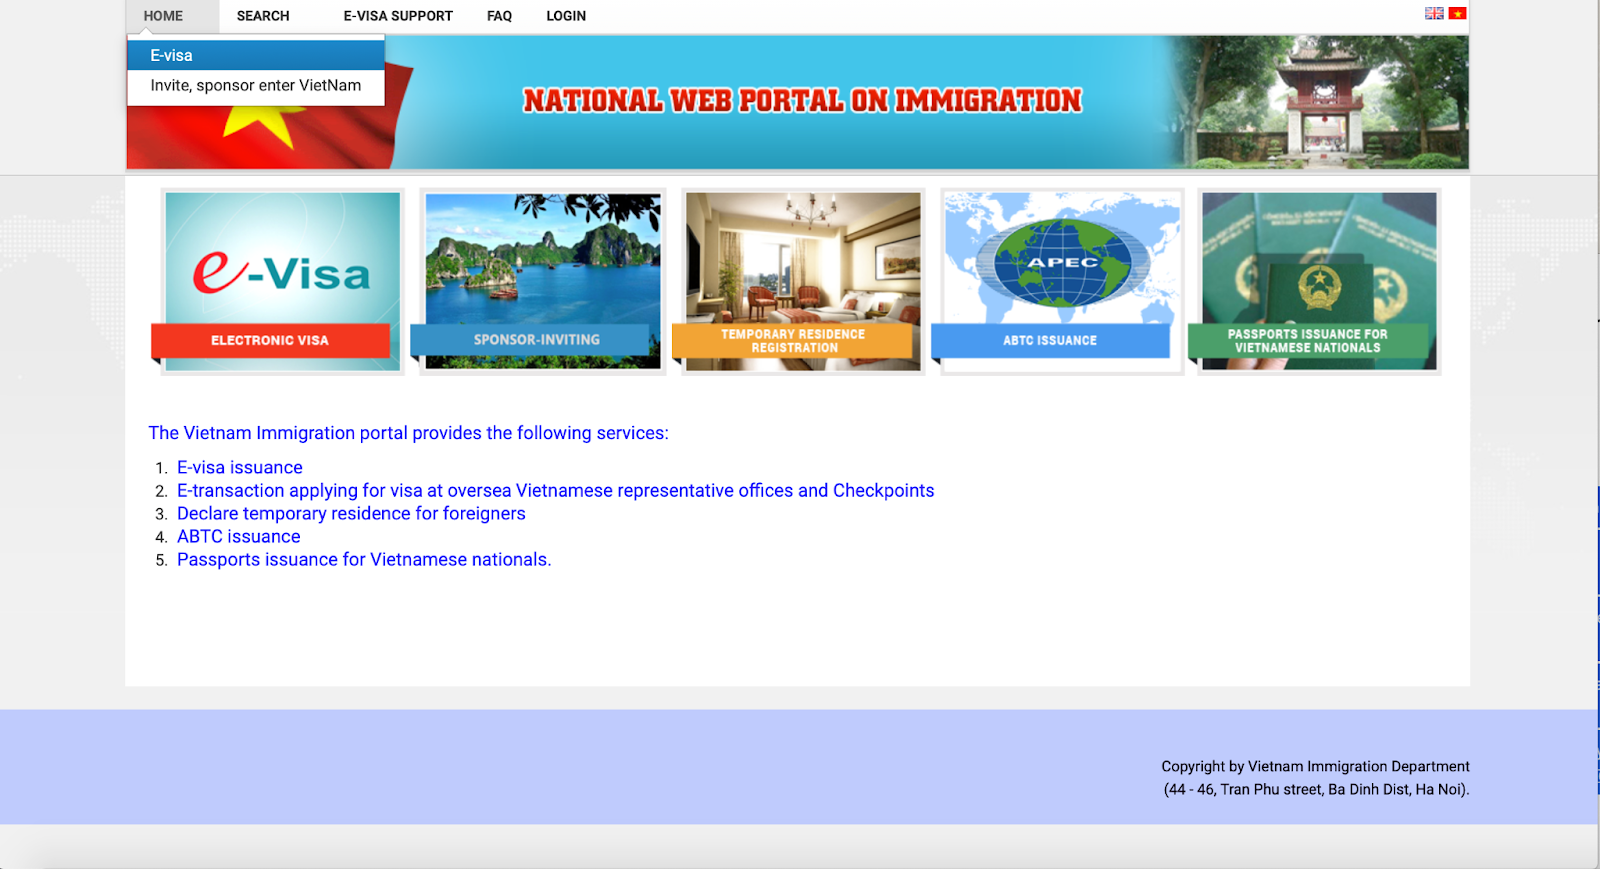
Simply select ‘E-visa’ in the upper left-hand corner.
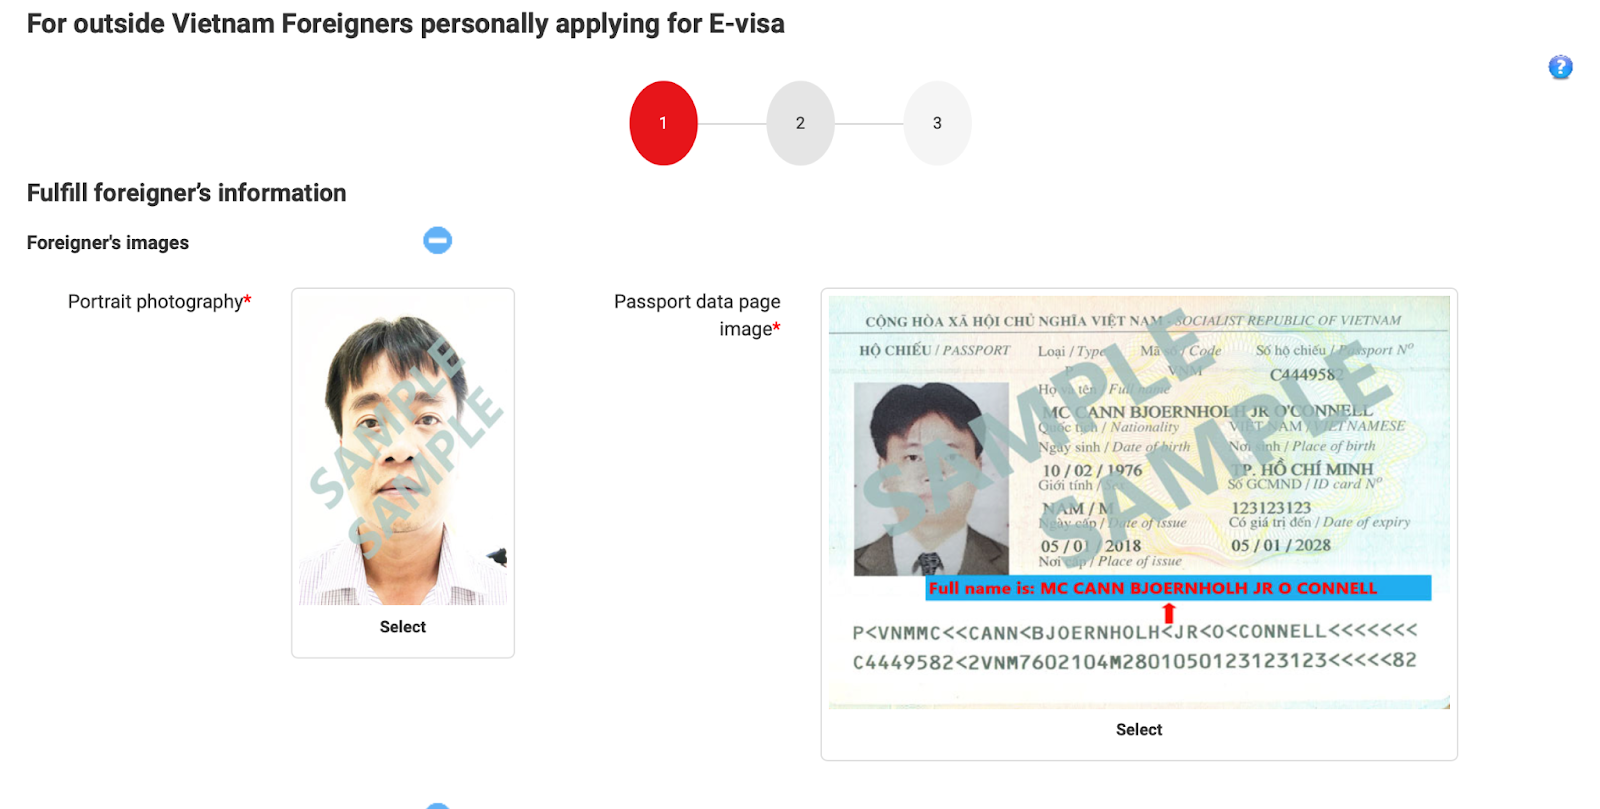
Step 2: Personally Apply For E-Visa

Scroll down to ‘personally apply for E-visa’ and click on it. Or, you can also scroll down to ‘Selections’ and click ‘For outside Vietnam foreigners’. Both will take you to the beginning of the visa application.

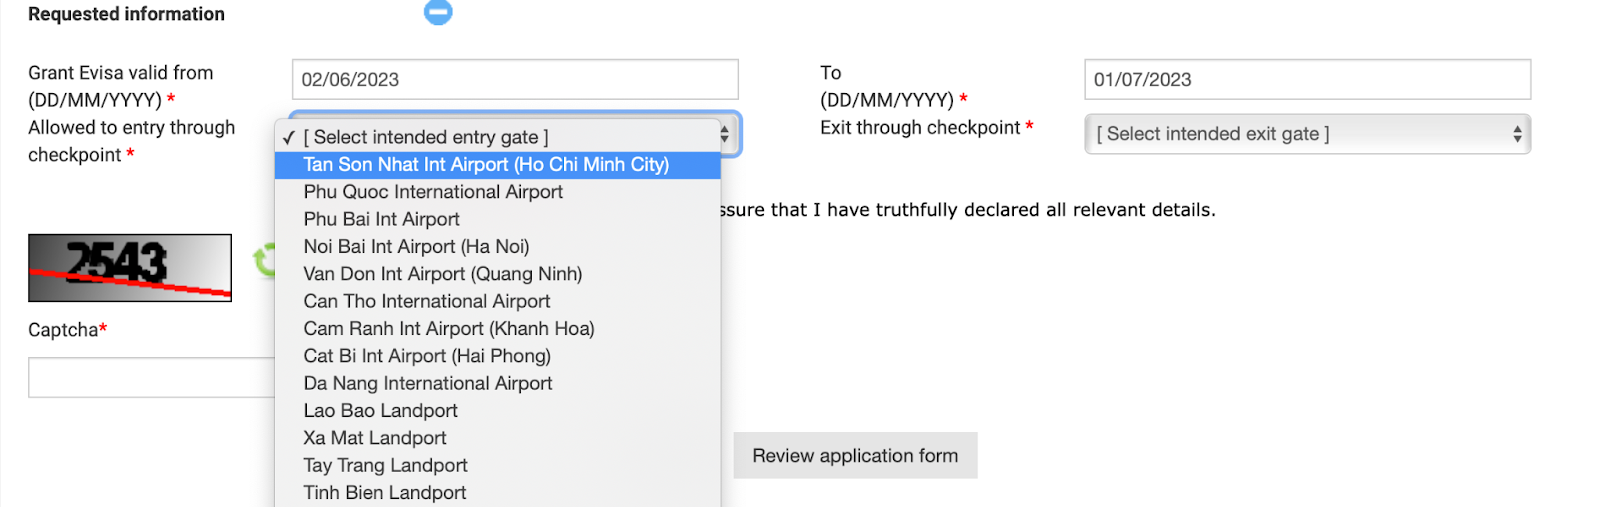
While I don’t see this being an issue for anyone reading this, just make sure that the point of entry you intend to enter Vietnam through is on the available list for E-visas: https://evisa.xuatnhapcanh.gov.vn/documents/20181/117155/List-of-evisa-port.pdf/c774e24b-1ab8-4fb6-9ac1-dcdfaccecf8e – all major Vietnamese airports, seaports, and land crossings are allowed.
Step 3: Filling Out Your Passport Details
Make sure to have an online image of your passport handy for this step. You will also need to provide a photograph of you looking straight at the camera without glasses. For this photograph, I just used my passport photo.
Below your passport and portrait pictures, it’s time to start filling in your personal details. These include your nationality, passport number, date of birth, intended length of stay, and more. The main thing I would draw your attention to is the ‘intended date of entry’, which should be the same date as the one you enter under ‘grant E-visa valid from…’.
And remember, your intended temporary residential address in Vietnam does not need to be set-in-stone. I put a location I was planning on staying (the aparmtent I used to live in Saigon) but there were no available apartments.
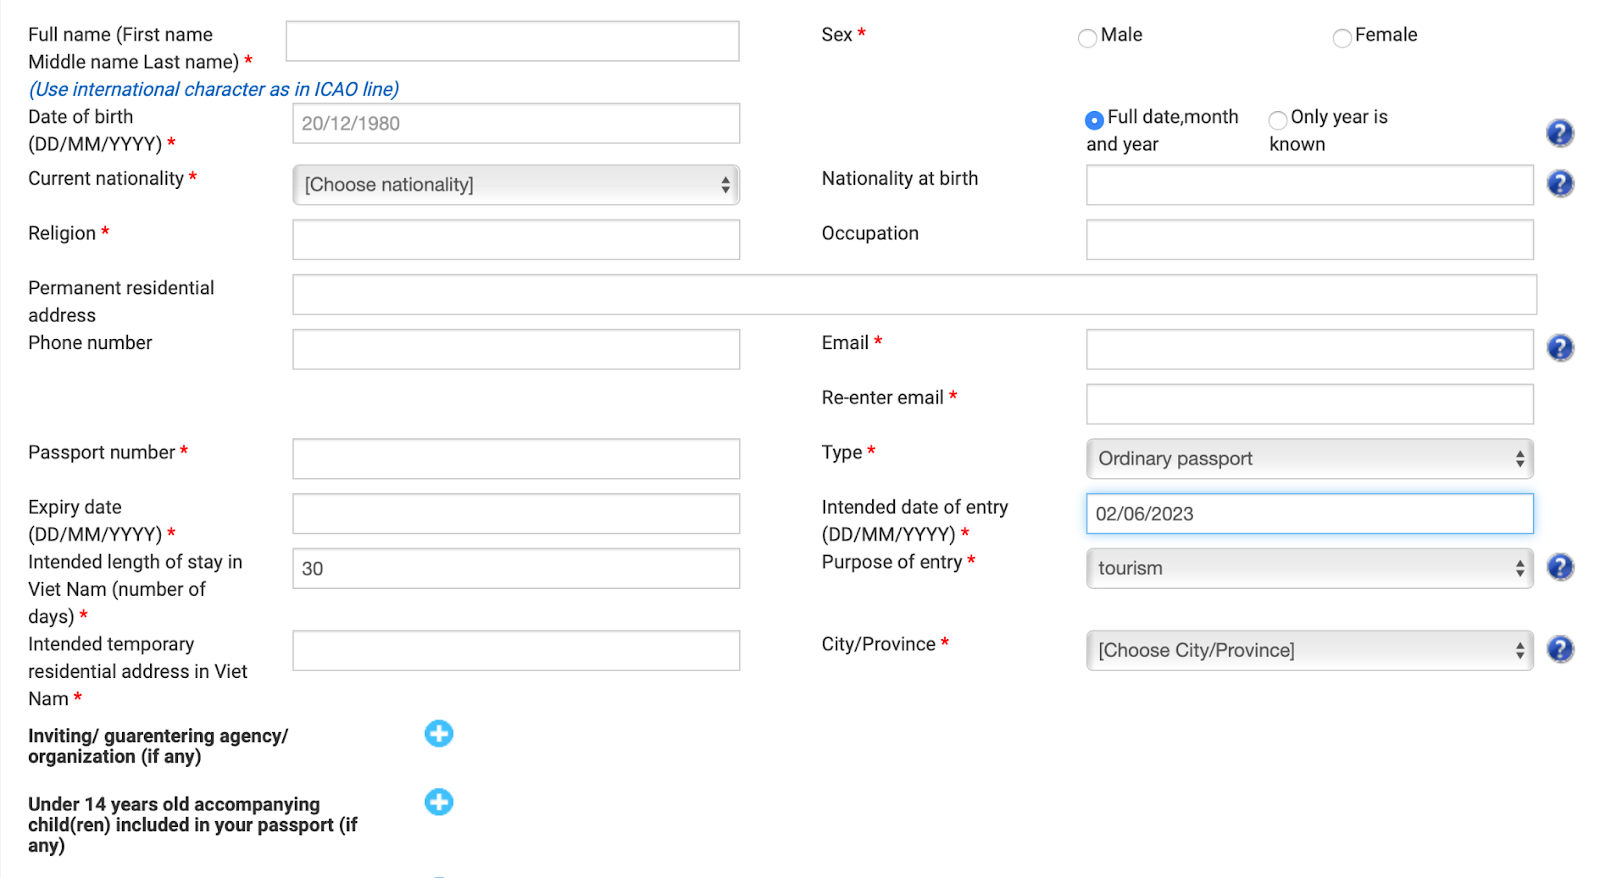
Also, make sure that you know both your entry and exit points to and from Vietnam. I frequently fly into Ho Chi Minh City, so my selected entry and exit points were both ‘Tan Son Nhat Int. Airport’ (Ho Chi Minh City).
How Much Does a 30 Day Vietnam E-Visa Cost?
After double-checking all of your personal information and trip details, click ‘Review application form’. You’ll then sign off with a final confirmation and be taken to the payment portal. The total cost (at the time of publication) of the 30-day Vietnam E-visa is USD 25.
I should note that I did have issues paying with my American Express credit card and had to start the application process from scratch. After using a Visa credit card for my payment information, the transaction was settled almost immediately and I received a confirmation email from the Vietcombank Payment Gateway.
You will also receive a ‘registration code’ which can be used to check the status of your E-visa over at: https://evisa.xuatnhapcanh.gov.vn/en_US/web/guest/tra-cuu-thi-thuc
How Long Does It Take For Your Visa to Be Approved & Issued?
The official Vietnam government FAQ states that they will process the visa within 3 days after the Immigration Department receives the completed application and visa fee. I applied for my visa on a Monday morning and received confirmation of approval on Thursday afternoon – just over 3 days.
I received a confirmation email from the Vietnamese Immigration Department later that night confirming its approval and issuance.
The general time frame I have read online, heard from friends who applied before me, and experienced personally, it will take anywhere from 3 to 5 business days for the visa’s approval and issuance.
Keep in mind that if you apply on a Thursday or Friday, it may take slightly longer and that ‘working days’ do not include Saturday and Sunday.
Pale Ale Travel Tip: If you are in a bind and need your visa expedited, I would consider reaching out to one of the reputable Vietnamese visa agencies such as Vietnam Visa to obtain an ‘urgent visa’. Their website notes that they have been able to successfully acquire visas within just hours before landing in Vietnam. I would caution you to do your own research and try and apply a reasonable amount of time in advance if possible.
Checking Your E-Visa Status
As noted above, you can check your E-visa status over at https://evisa.xuatnhapcanh.gov.vn/en_US/web/guest/tra-cuu-thi-thuc.
Simply enter your registration code, the email address used to apply for the visa, and your date of birth.
Make Sure to Print Your E-Visa
You cannot simply just show Immigration the online approval of your E-visa – it must be printed! Although the Vietnamese Immigration officer didn’t even look at my printed E-visa, it is recommended that you print your E-visa before flying.
My friend who flew into Ho Chi Minh roughly two weeks after told me that Immigration asked for his printed E-Visa, so I recommend just making sure to cross all your Ts before arriving.
Final Thoughts on Obtaining a 30 Day Vietnam E-Visa
Overall, this was an incredibly painless process that is both intuitive and fast! I’m heading back to Vietnam in two weeks (I’m currently in Bangkok) and will be staying for another month in Saigon. You can bet your bottom dollar that I will be using this same visa portal to secure my 30-day E-visa.
I know it can be daunting traveling to a country that you are unfamiliar with and that has been relatively opaque at points with the actual visa situation (and the number of days). If you have any questions or comments about obtaining a 30-day E-visa for Vietnam, don’t hesitate to reach out to me in the comments or via my contact form.
Also, I’d love to hear your favorite things to do in Vietnam, especially Saigon (as it is one of my favorite cities in the world), so please let me know in the comments!
Best and travel safe everyone,
Big Body
Big Body is a voracious lov…eater, a cowardly fighter, and a self-proclaimed curry goat BBQ-eating champion (don’t forget the donkey milk) who likes Stoicism, baseball, and writing in the third person. Having worked for himself for the last 7 years, he isn’t particularly successful but he does still drink ice-cold Sapporo draft beers with the best of them and knows his way around a Dai Pai Dong or two. He is based in Hong Kong but you can still find him in Saigon, Osaka, and Vienna for extended periods.